Scheduling
Scheduling a session (that does not require payment)
1. Log into the website to access your Dashboard, and scroll down to the scheduling buttons.

- New Session Now: Schedule a new session for right now (it will prepopulate the current date and time).
- New Scheduled Session: Schedule a new session for a future time (you choose the date and time).
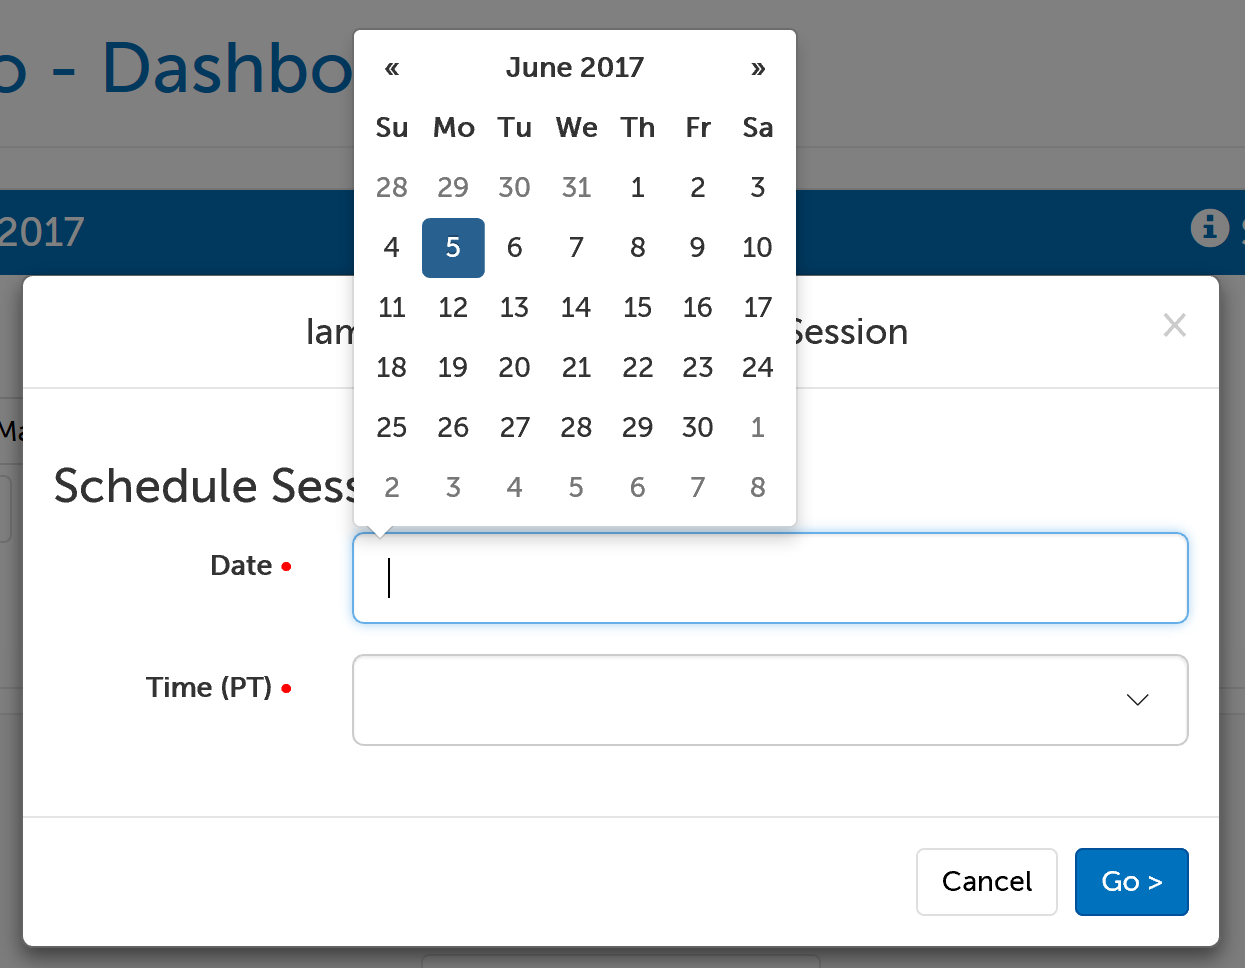
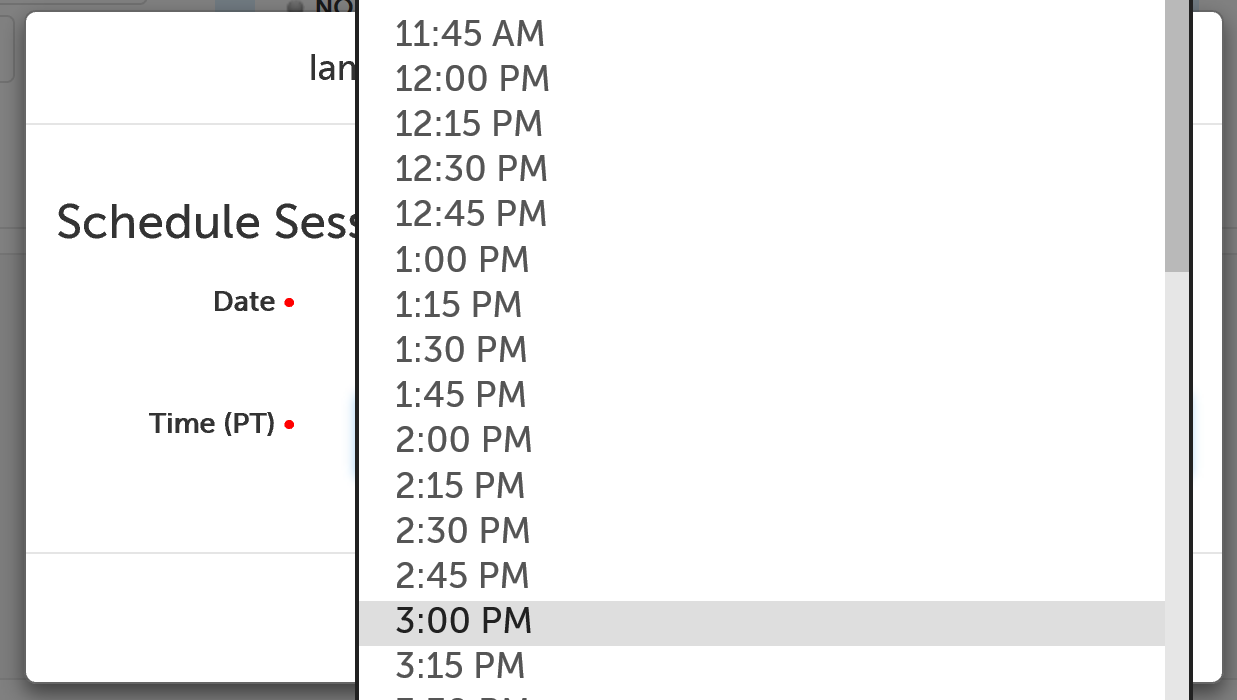
If you choose a New Scheduled Session, you will be prompted to select a date (image below and to the left) and time (image below and to the right):
2. Once the date and time is selected, or if you chose New Session Now, you will be prompted to enter information for your participant.
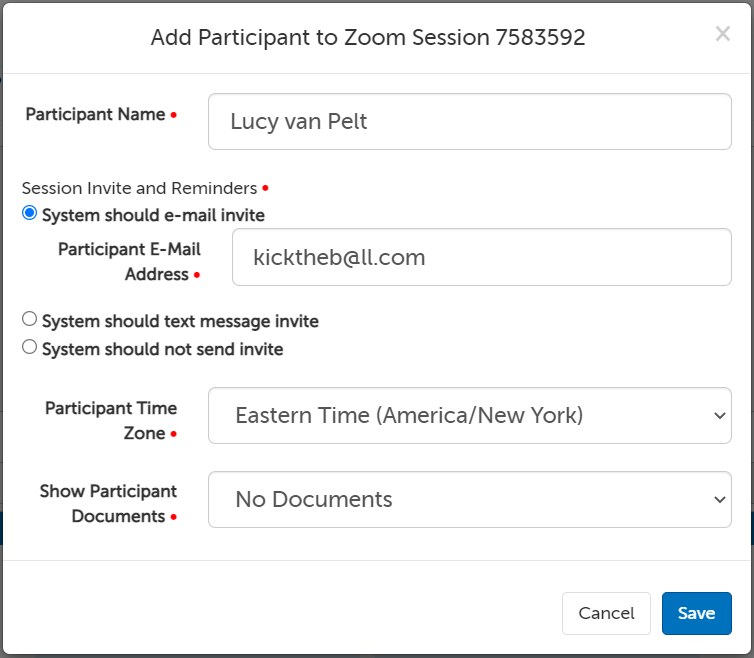
- Participant Name: Enter the name of the participant (minimum of 2 characters). If you have saved this person in your Contacts list or they are a user in the organization that you have permission to access, their name should appear in the autofill once you begin typing.
- If you would like to keep the Participant Name separate from the Display Name used in the session itself, please see How do Display Names work? to learn about enabling/using this feature.
- Session Invite and Reminders: Select the desired type, and a field will appear for the contact information required. Any contact information saved for this contact will pre-populate. If you would not like to enter contact information for this person, select System should not send invite.)
- Participant Time Zone: Choose the time zone your participant is in--this determines the time and date that will be used for their invitation and reminder e-mails or texts (this defaults to the time zone on your account).
- Show Participant Documents: If you have at least one active E-Document, you will see this question.
- Select "All Documents" to show all active documents to this participant.
- Select "No Documents" to NOT show any documents to this participant.
- If you have created a custom packet, you can select it to show that specific group of documents to this participant.
3. Click the Save button in the lower right-hand corner.
4. If you would like to add another person, use the "Add Participant" button for this session.

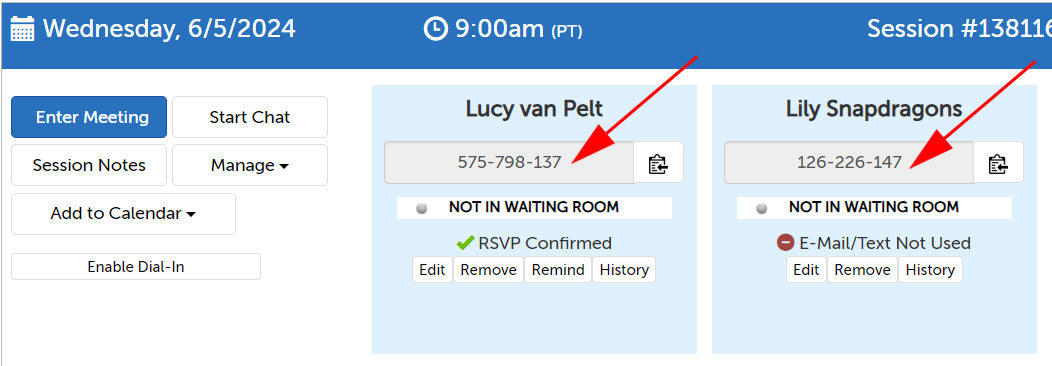
Note: If you choose the option "System should not send invite," you will need to remember to give the access code to the participant. (Their participant tile will have a note "E-mail/Text Not Used," to indicate no invitations have been sent to them.)
If you did not send email invitations, then communicate the 9-digit session Access Code to the invitee over the phone or by other private communication.
Scheduling a session (that requires a payment)
If you have set up Stripe integration and at least one Account Service, you have the ability to require payment before a participant can enter your session.
1. Log into the website to access your Dashboard, and scroll down to the scheduling buttons.

- New Session Now: Schedule a new session for right now (it will prepopulate the current date and time).
- New Scheduled Session: Schedule a new session for a future time (you choose the date and time).
If you choose a New Scheduled Session, you will be prompted to select a date (image below and to the left) and time (image below and to the right):


2. Once the date and time is selected, or if you chose New Session Now, you will be prompted to enter information for your participant.
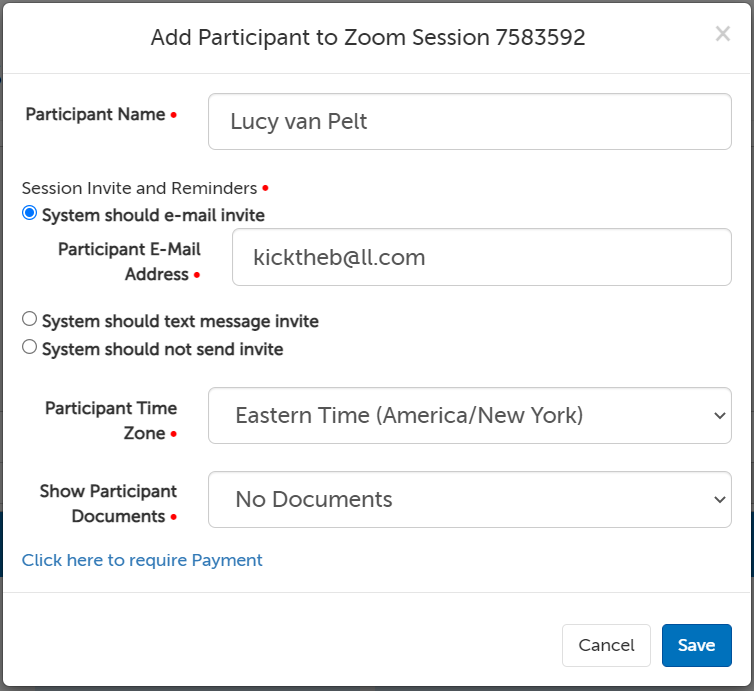
- Participant Name: Enter the name of the invitee (minimum of 2 characters). If you have saved this person in your Contacts list, their name should appear as an autofill once you being typing.
- If you would like to keep the Participant Name separate from the Display Name used in the session itself, please see How do Display Names work? to learn about enabling/using this feature.
- Session Invite and Reminders: Select the desired type, and a field will appear for the contact information required. Any contact information saved for this contact will pre-populate. If you would not like to enter contact information for this person, select System should not send invite.)
- Participant Time Zone: Choose the time zone your participant is in--this determines the time and date that will be used for their invitation and reminder e-mails or texts (this defaults to the time zone on your account).
- Show Participant Documents: If you have at least one active E-Document, you will see this question.
- Select "All Documents" to show all active documents to this participant.
- Select "No Documents" to NOT show any documents to this participant.
- If you have created a custom packet, you can select it to show that specific group of documents to this participant.
3. Click on the link: "Click here to require Payment". This will expand the window so that you can select the service and set the price for the session.
- This link might use different text if your account administrator has chosen to change it in Account Options.
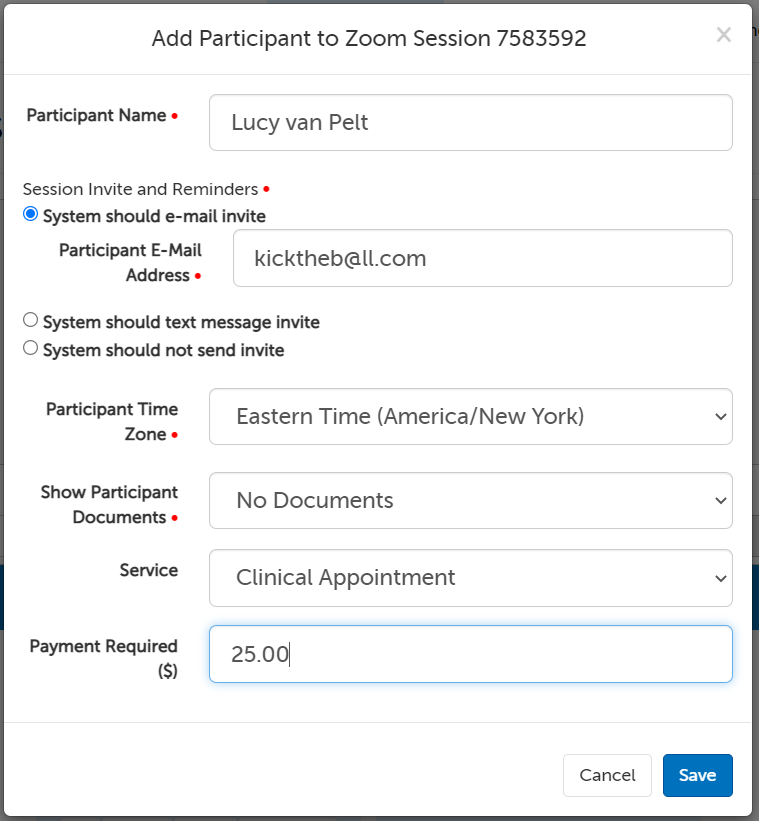
4. Click the Save button in the lower right-hand corner.
5. If you would like to add another person, use the "Add Participant" button for this session.

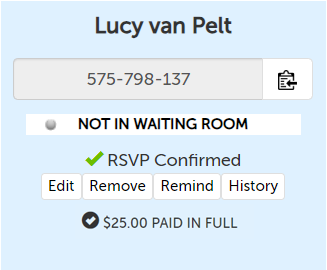
You will receive a confirmation email when your participant makes a payment, and the status on your dashboard will also change to note that the fee amount was paid in full:
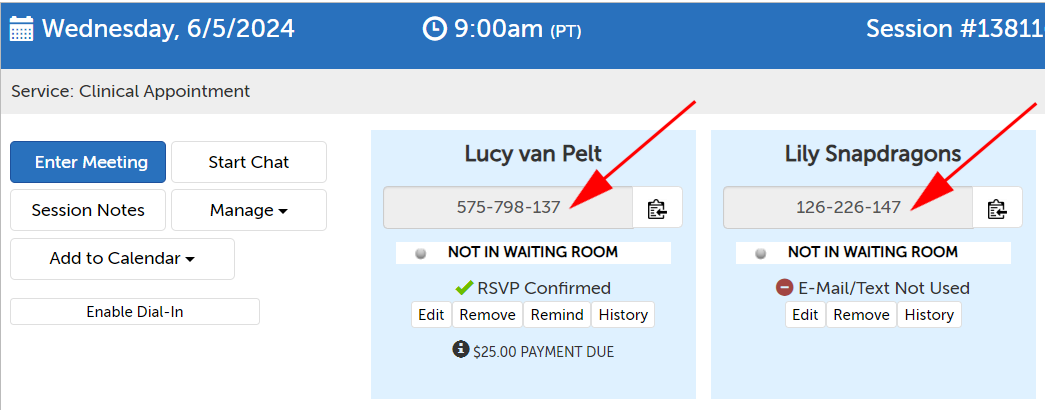
Note: If you choose the option "System should not send invite," you will need to remember to give the access code to the participant. (Their participant tile will have a note "E-mail/Text Not Used," to indicate no invitations have been sent to them.)
If you did not send email invitations, then communicate the 9-digit session Access Code to the invitee over the phone or by other private communication.
Adding or editing a meeting topic
A meeting topic is an internal label (not visible to non-organization users) that can be added to a session for the host's reference. By default, they can be optionally added after a session has been created. You or your account administrator can change this default in the Account Options or My Options.
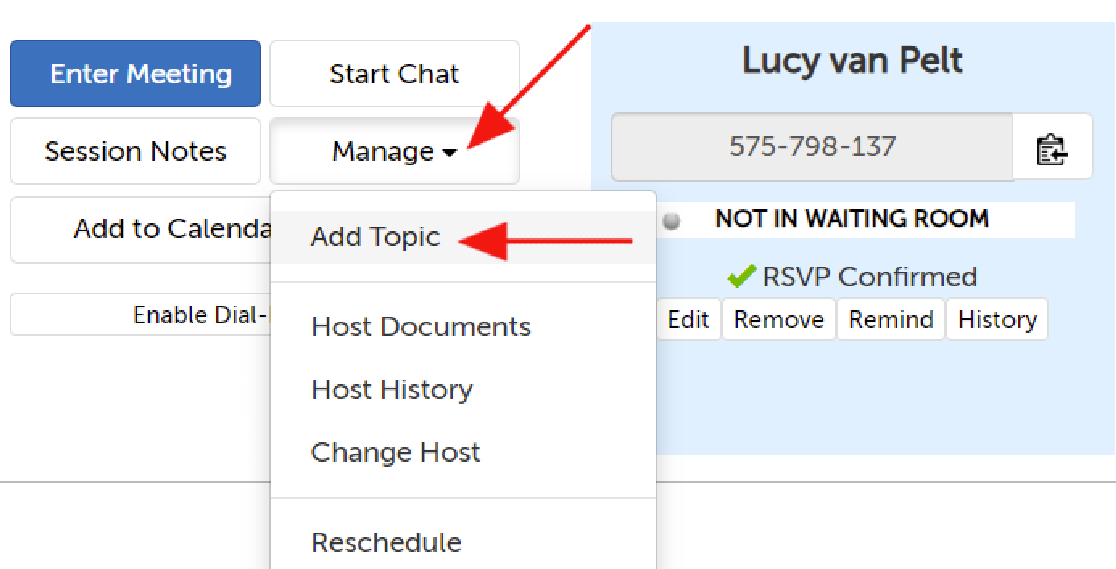
1. Click on the "Manage" button for the session.
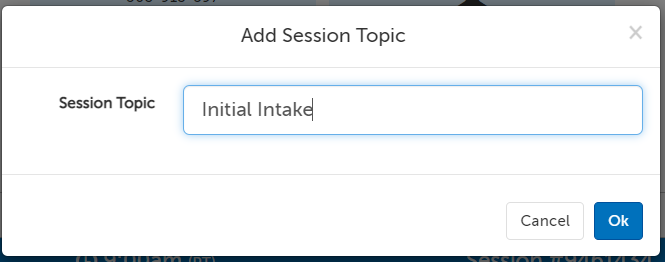
2. Type in the desired meeting topic and click "Ok".
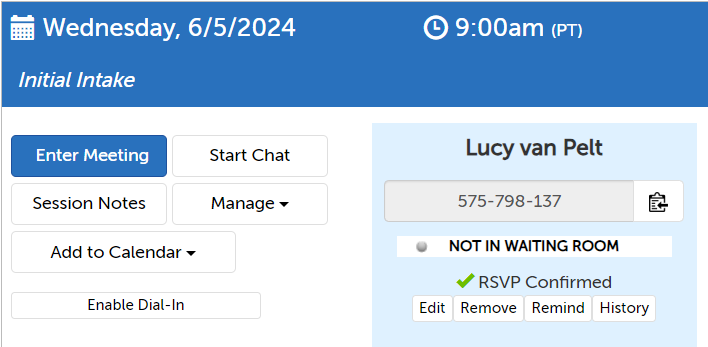
3. The meeting topic will appear in italics on the session panel.
Options
Show 'New Session' buttons at the top of the dashboard
The buttons to create a new session are shown at the bottom of the dashboard by default. However, if you'd like this to always be at the top, please see the steps below:
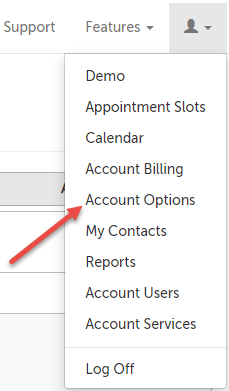
1. Click on the profile icon and select Account Options.
- If your account has multiple users and you are changing only for yourself, click "My Options".
- If your account has multiple users and you are changing only for one user, click "Account Users". Then click the "Options" button next to the specific user you want to edit settings for.
2. Click to expand Navigation and Access.
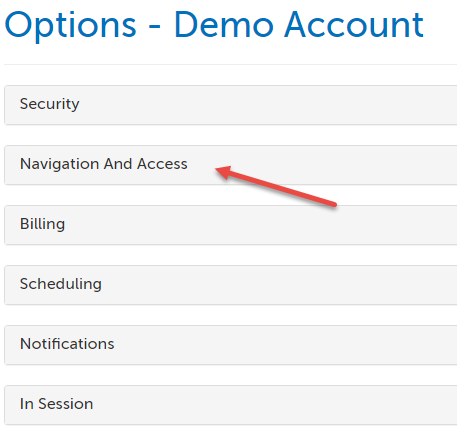
3. Scroll down to "Show 'New Session' buttons at the top of the dashboard" and select 'Yes'. The change will save automatically.

How to change Scheduling Intervals
1. Click on the profile icon and select Account Options.
- If your account has multiple users and you are changing only for yourself, click "My Options".
- If your account has multiple users and you are changing only for one user, click "Account Users". Then click the "Options" button next to the specific user you want to edit settings for.

2. Click to expand Scheduling.
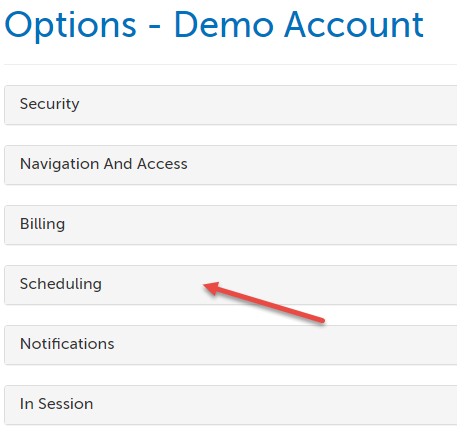
3. Scroll to the option 'Scheduling Interval' (Minutes) and click the drop down to select your preferred minutes. The change will save automatically.

Use Display Names for Contacts
1. Click on the profile icon and select Account Options.
- If your account has multiple users and you are changing only for yourself, click "My Options".
- If your account has multiple users and you are changing only for one user, click "Account Users". Then click the "Options" button next to the specific user you want to edit settings for.

2. Click to expand Scheduling.

3. Scroll to the option "Use Display Names for Contacts" and select "Yes" or "No". The change will save automatically.
- If enabled, an additinoal name field is added for Contacts. This Display Name field will be used on the video window in sessions instead of the contact's full name.

How to change Default Duration for Meetings
1. Click on the profile icon and select Account Options.
- If your account has multiple users and you are changing only for yourself, click "My Options".
- If your account has multiple users and you are changing only for one user, click "Account Users". Then click the "Options" button next to the specific user you want to edit settings for.

2. Click to expand Scheduling.

3. Scroll to the option "Default Duration for Meetings (Minutes)" and change the number here to change the default number of minutes that the system assumes a session will last. The change will save automatically.
- As noted in the setting text, sessions can go on for an unlimited number of minutes as long as the host remains in the session. This setting only affects the default amount of time that will be blocked off when the host or participant adds the session event to their calendar. (If an Account Service is selected for a session, the calendar event will use the duration specified in the Account Service instead.)

Setting: How to change Reminder Intervals
The buttons to create a new session are shown at the bottom of the dashboard by default. However, if you'd like this to always be at the top, please see the steps below:
1. Click on the profile icon and select Account Options.
- If your account has multiple users and you are changing only for yourself, click "My Options".
- If your account has multiple users and you are changing only for one user, click "Account Users". Then click the "Options" button next to the specific user you want to edit settings for.

2. Click to expand the "Notifications" section.
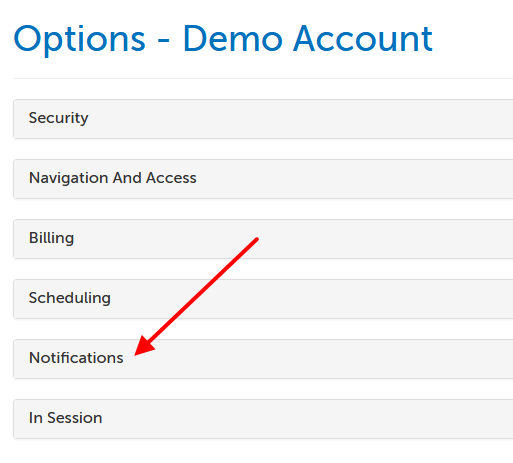
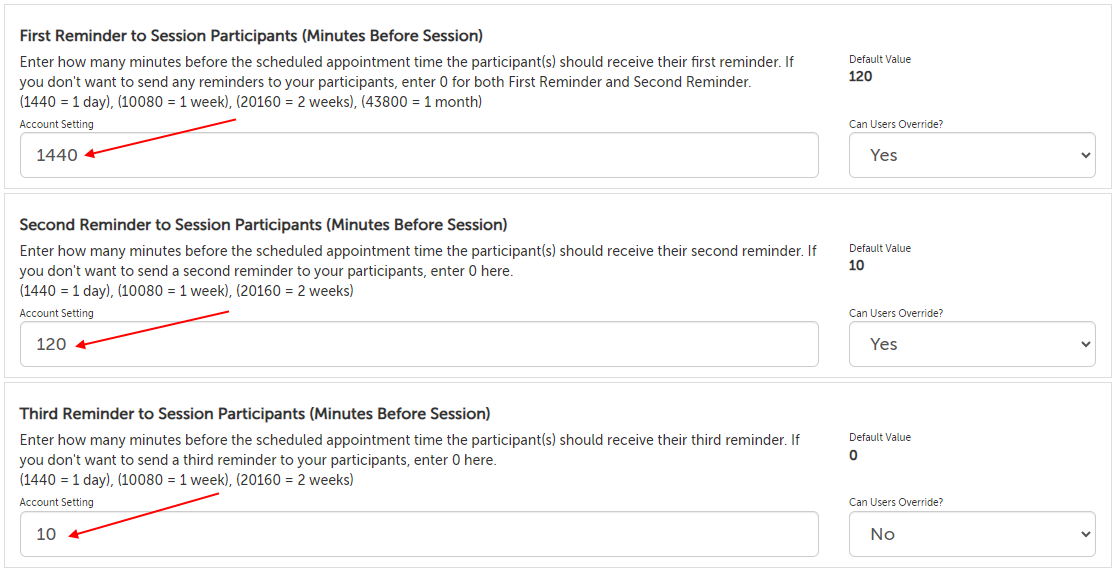
3. The setting names are:
- First Reminder to Session Participants (Minutes Before Session)
- The value for this setting can be between 0 to 43200
- Second Reminder to Session Participants (Minutes Before Session)
- The value for this setting can be between 0 to 20160
- Third Reminder to Session Participants (Minutes Before Session)
- The value for this setting can be between 0 to 20160
Change the number value within the field to change when the reminder is sent (the number is minutes prior to the scheduled date and time of the session); use only whole numbers and do not use commas. Enter "0" if you would not like that reminder to be sent at all. The change will save automatically.
- If you are an Account Administrator, you can also choose to allow users to set this setting for themselves or not. If "Can Users Override?" is set to
- Yes: Host users will be able to see and change this setting for themselves in their "My Options" menu.
- No: Host users will not be able to see (and therefore cannot change) this setting for themselves in their "My Options" menu. You can still edit this session per user as an Account Administrator.
Setting: Meeting Topic
1. Click on the profile icon and select Account Options.
- If your account has multiple users and you are changing only for yourself, click "My Options".
- If your account has multiple users and you are changing only for one user, click "Account Users". Then click the "Options" button next to the specific user you want to edit settings for.

2. Click to expand Scheduling.

3. Scroll to the option "Meeting Topic" and click the drop down to select your preferred setting. The change will save automatically.
- Optional after session creation: This will allow users to add a Meeting Topic after a session has been created, but not during the session scheduling process.
- Optional on session creation: This will allow users to add a Meeting Topic when scheduling a session, but it will not require a topic.
- Required on session creation: This will require users to add a Meeting Topic in order to schedule a session.
- Don't use session topics: This will prevent the option from appearing when scheduling a session or after a session has been created.

Setting: Show Warning Upon Overbooking
1. Click on the profile icon and select Account Options.
- If your account has multiple users and you are changing only for yourself, click "My Options".
- If your account has multiple users and you are changing only for one user, click "Account Users". Then click the "Options" button next to the specific user you want to edit settings for.

2. Click to expand Scheduling.

3. Scroll to the option "Show Warning Upon Overbooking" and select "Yes" or "No". The change will save automatically.

Enable/Disable Meeting RSVPs
1. Click on the profile icon and select Account Options.
- If your account has multiple users and you are changing only for yourself, click "My Options".
- If your account has multiple users and you are changing only for one user, click "Account Users". Then click the "Options" button next to the specific user you want to edit settings for.

2. Click to expand the "Notifications" section.
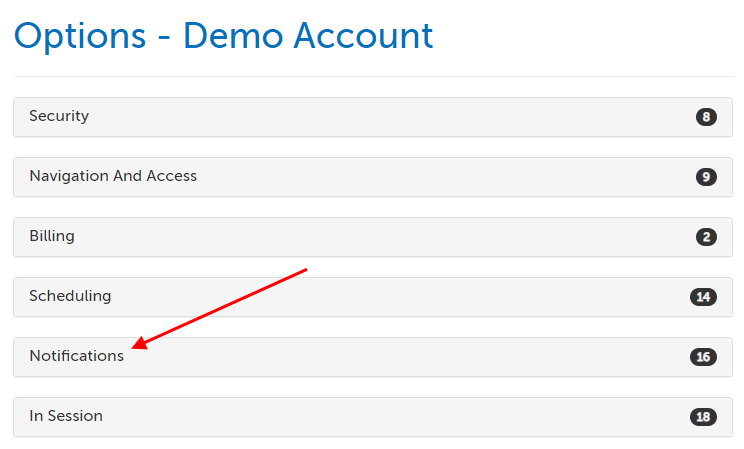
3. Scroll to the option "Enable Meeting RSVPs?" and set this to "Yes" or "No". The change will save automatically.
- If Meeting RSVPs are enabled, then an option to RSVP will be included in e-mail or text message invites and reminders, and on the waiting room page. If this setting is disabled, then there will not be any text or buttons to allow the participant to RSVP to accept or decline the session and the below settings for Non-Confirm and Accepted/Declined Notifications will be ignored.
- NOTE: If you disable this setting, and you have a different way that you want participants to contact you regarding a session, you can add custom text to email invites above the "Join Session" button; see the support article: Customer Extensions: how to use Notification Customer Extensions

This article was last reviewed by our Support team on December 27, 2023.